28 Nov How the JCR Manager 3D Smart Printing Software Works
JCR 3D Smart Printers feature the JCR Manager 3D smart printing software, which automatically detects and corrects errors in files and verifies printing configuration. This solves 80% of the typical incidents that arise when working with FFF or FDM technology (such as errors in file design, errors in generating G-Code files, blockages, wearing of the extruder, and more).
In this article, we are going to go over the noteworthy functions of the JCR Manager software that allow you to maximise productivity, reduce equipment maintenance, and eliminate human errors in the 3D design and printing phase.
JCR Manager – 3D smart printing software
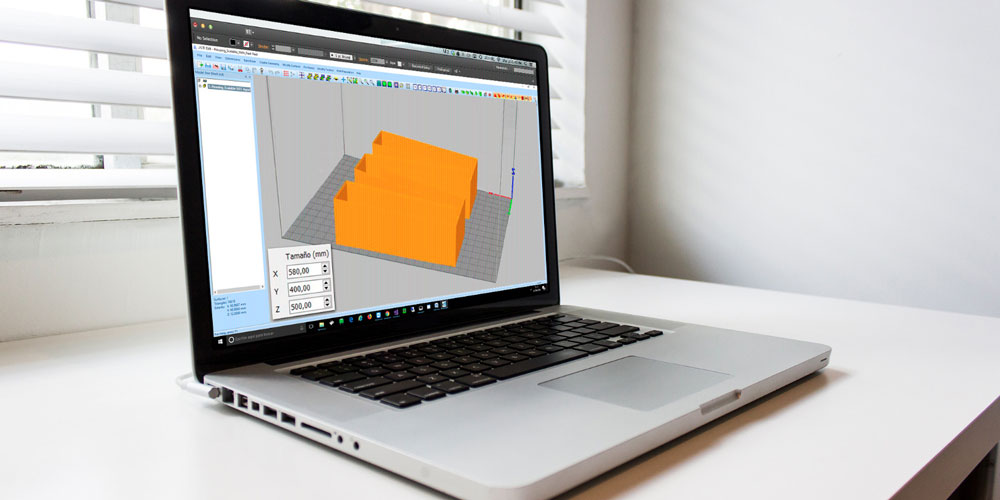
In 3D printing, you begin with a solid file that is normally in .stl format (although OBJ can also be used in our software).
This .stl file can be obtained in 2 ways:
- From a design.
- From a 3D or digital scan of a real piece.
Sometimes, generating this type of file leads to small errors or operations that do not belong to the piece that you want to print. To pre-emptively address the problems these errors may cause when printing the piece, JCR 3D printers are equipped with monitoring and management software that detects and corrects these flaws.
In the diagram below, you can see how the JCR Manager 3D smart printing software works:

Detection and correction of design and/or exporting errors
Once an .stl file is loaded in JCR Manager, the programme guides the user through a simple process with different modules.
The first module, Automatic Check, analyses the .stl file’s structures, faceting, and other parameters.
The result of this analysis may be satisfactory, meaning the file does not contain errors and you can continue with the printing management process. On the other hand, the system may show an error code, indicating that it is necessary to repair the file.
If there is an error notification, there are 2 possible situations:
- The file contains simple errors and/or it is less than 50 MB. In this case, Automatic Check will analyse and repair the flaws automatically so that after the analysis, the file is already repaired and you can continue with the process.
- The other possibility is that the file contains complex errors or it is larger than 50 MB, meaning the file cannot be repaired automatically. In this case, you can use the JCR Edit module which, thanks to its highly-advanced options, allows you to repair the file. Furthermore, JCR Edit offers users the most common everyday functions, including cutting solids, designing assemblies, marking, numbering, scaling, and more.
Once the .stl file has gone through the Automatic Check module—or JCR Edit if there are complex errors—you will have a correct STL file: no inverted normals, no closing errors, no intersections between faces, etc.
Detection and correction of G-Code files
Next, open the file with Simplify3D®, a 3D slicer software which converts an .stl file into a G-Code file that is able to be interpreted by the printer and has the parametrization and configuration that the user wants and/or has optimised: extruder configuration, layer height, printing quality, infill density, and more.
Once you have the G-Code file, load it into the JCR Manager file library. There, the File Tester module analyses the parameters in the G-Code file and compares them to the set parameters or ranges that are predefined as optimal for the printer.
Again, this analysis can yield two possible results:
- In the first case, the file does not contain errors and the printing process for the piece begins. It is highly probable that printing will be correct because it has been verified that all parameters correspond with optimal parameters for printing, taking into account the material, characteristics of the printer, nozzle, layer height, etc.
- In the second case, File Tester detects errors in the parameters and automatically shows an error notification. The printer does not allow for printing to begin and shows a list of parameters that contain errors as well as possible solutions. In this case, open the file in Simplify3D® again, modify the configured parameters that contain errors, generate a new G-Code file, and repeat the analysis with File Tester until the analysis determines there are no flaws. When the G-Code file is error-free, you can start printing the piece.
In addition to the JCR Manager 3D smart printing software, all printers include the Time-Lapse function. This allows for time-lapse videos of the printing process to be downloaded and managed for supervision and analysis. The printers also include other functions to assure printing quality, such as a system for self-levelling during printing, guided assistants for calibrating the base and extruders, UPS with smart interaction with the printer, a resume print system following an electrical outage, control and notification of the end of the filament, notification assistant, preventative maintenance control, and more.
On our product page, you can find detailed information on all available JCR 3D smart printer models and can view their technical datasheets.